What is an alert?: An ‘alert’ is a system notification in Microsoft Dynamics AX to a user or a group of users. Alerts can be programmed to pop up in the lower right hand portion of the users’ screens in AX. Alerts can also be set to send an email.
Alerts can be triggered by: A date/time event – such as a report running every week at a certain time. An update event – such as when a posting job runs or a value in a field gets changed. A record create or delete event, which will trigger each time a specified record is created or deleted.
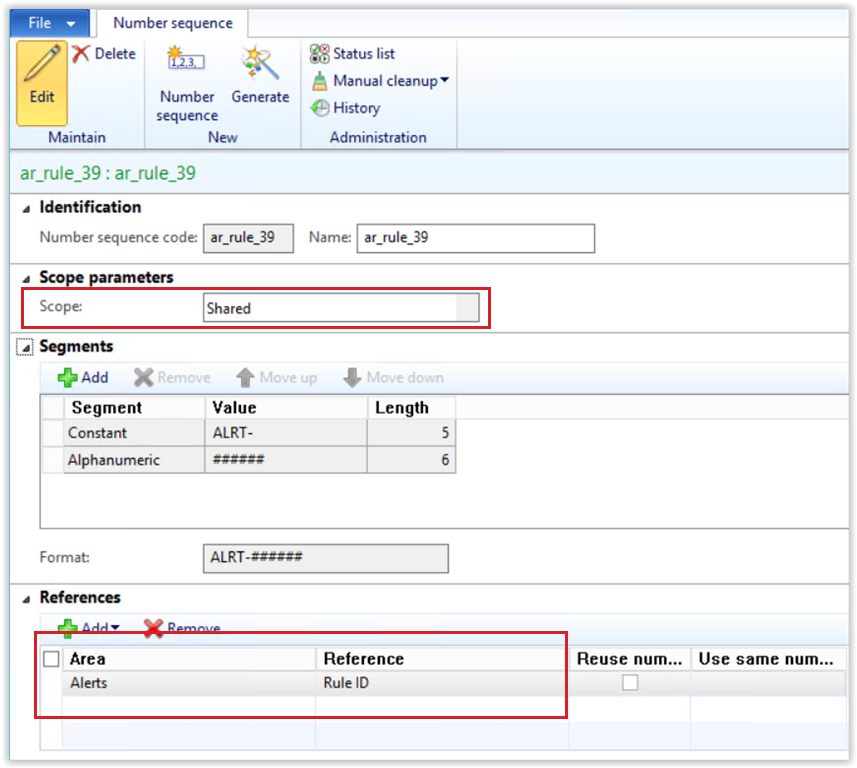
Set up an alert number sequence: Organization administration > Common > Number sequences > Number sequences. This is a system-wide step if the number sequence is ‘Shared’ in the scope parameters. In References, the ‘Area’ should be ‘Alerts’ and the ‘Reference’ should be ‘Rule ID’.
There are two types of batches that can be set up:
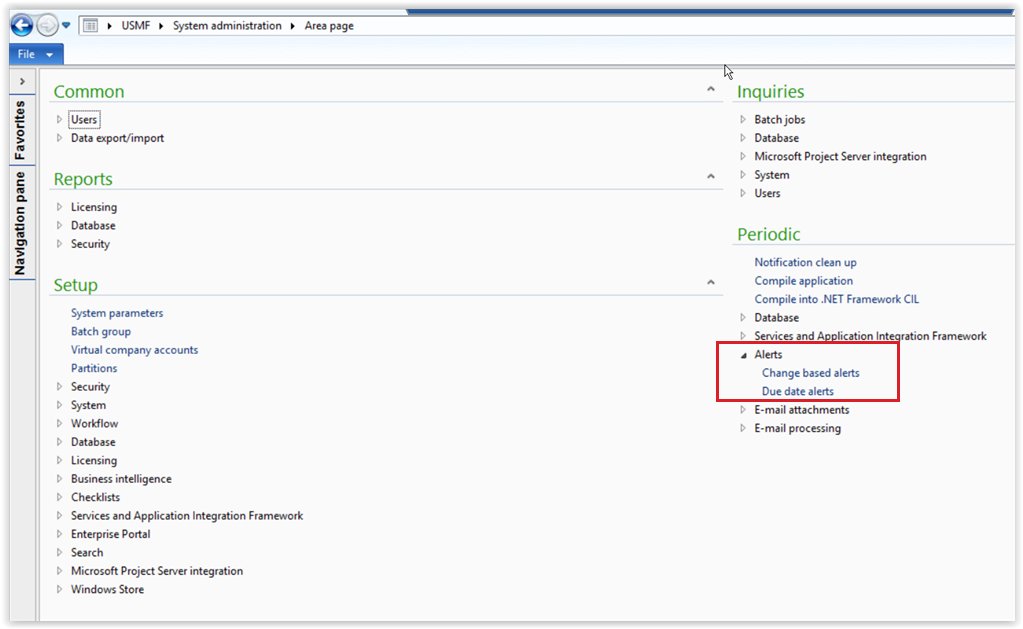
Due date alerts: System administration > Periodic > Alerts > Due date alerts.
Change based alerts: System administration > Periodic > Alerts > Change based alerts.
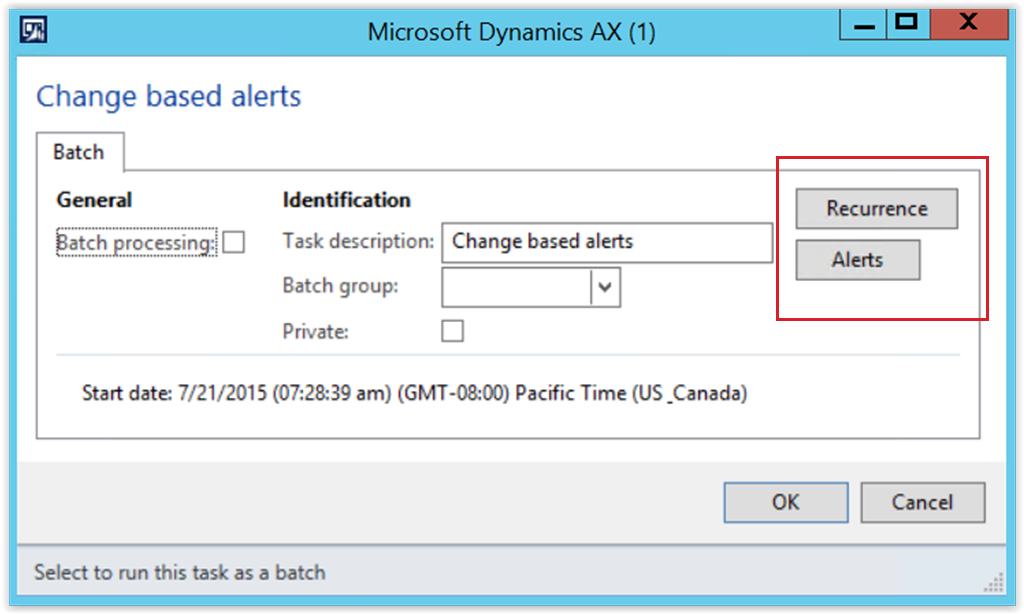
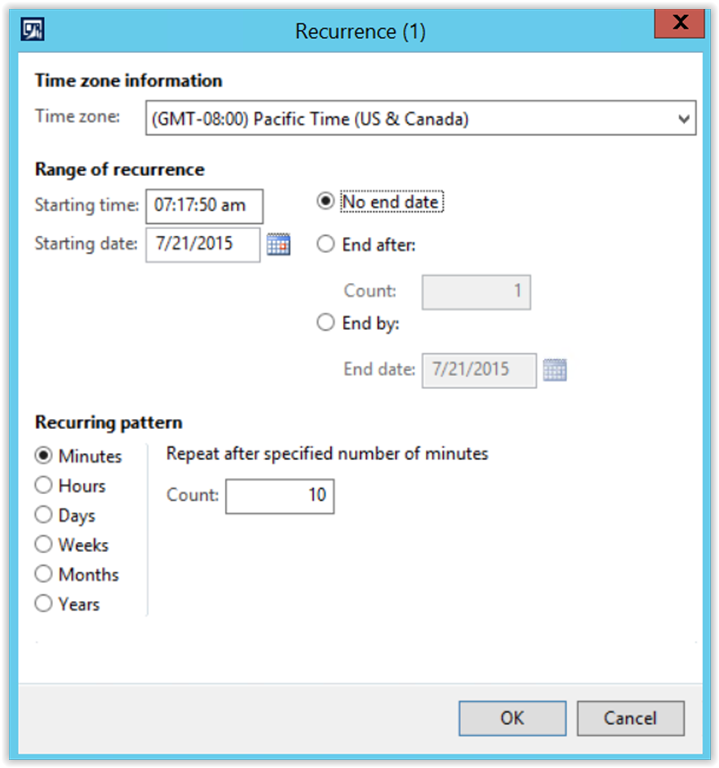
For each of these batch parameters forms: The ‘Recurrence’ button sets the schedule. (Batch job alerts can be set to run as frequently as every minute if processing power is not an issue).
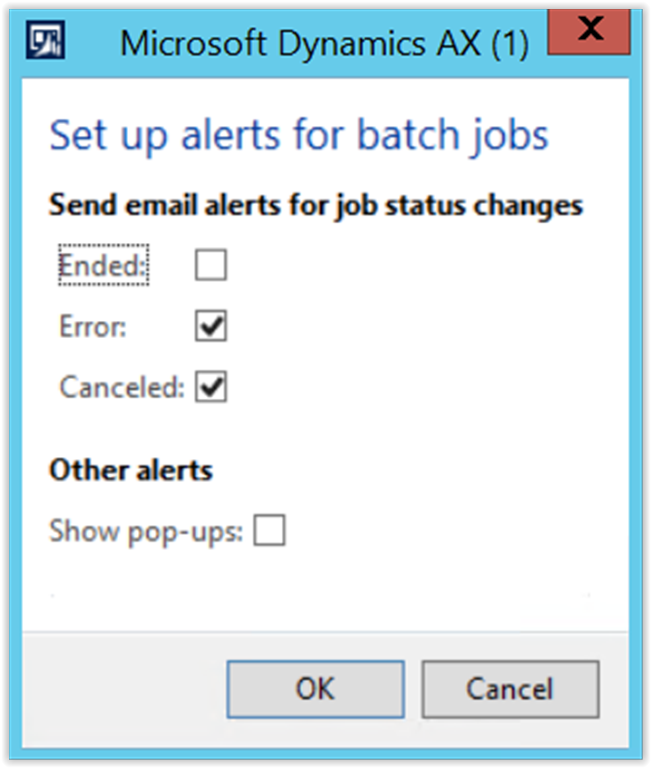
The ‘Alerts’ button has IT administrative notification selections for the batch job status changes. (Recommended settings for Error and Canceled only)
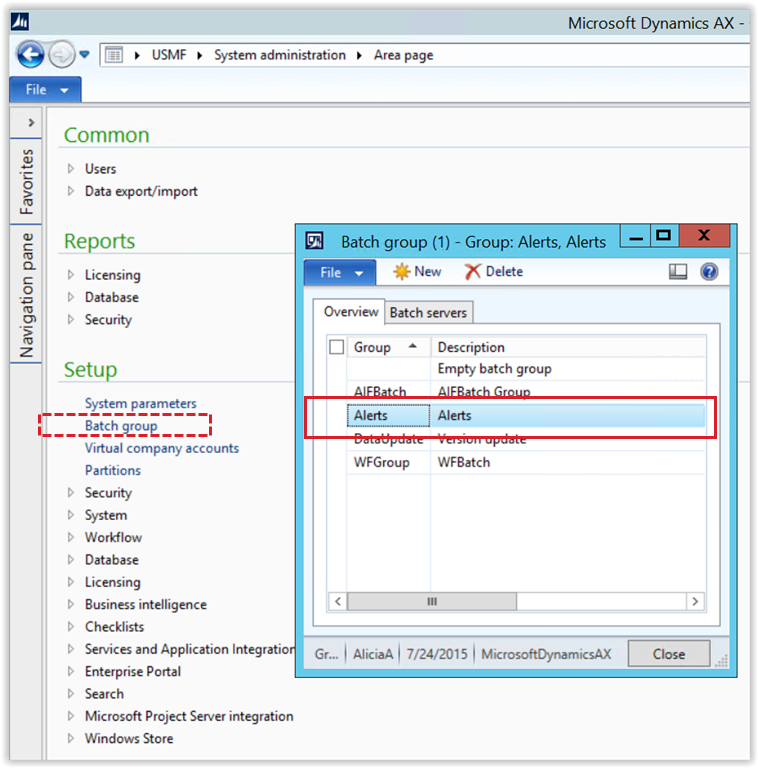
*Batch processing selection on the alerts parameters form should be activated after creating a Batch group. Create a Batch group System administration > Setup > Batch group. On the Batch servers tab choose a selected server(s).
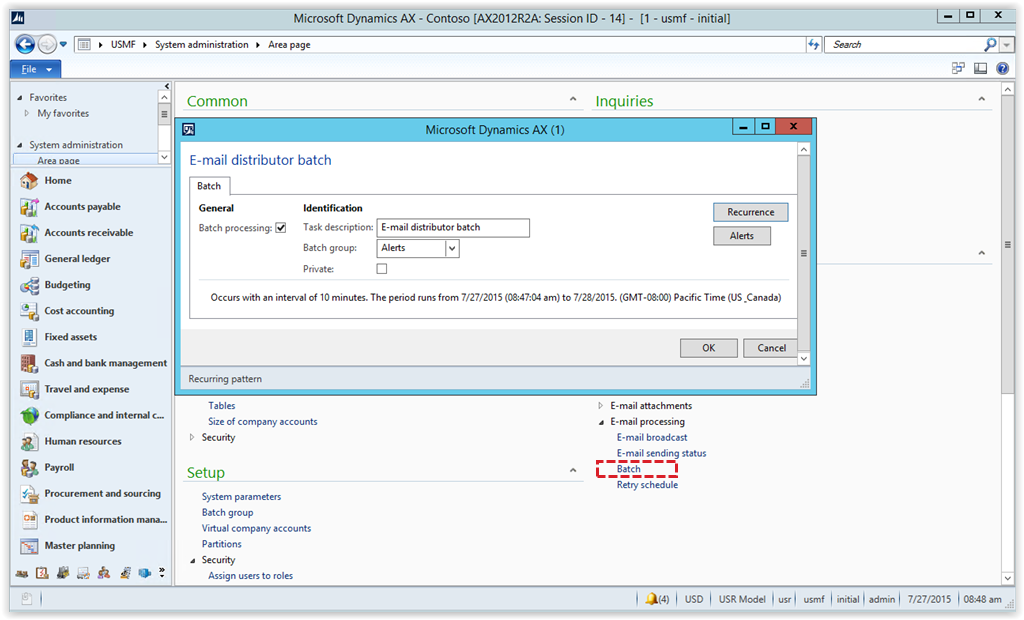
Next you need to create an email batch job. Go to System administration > Periodic > E-mail processing > Batch and set the Recurrence. Set Alerts on this form if you want to be notified of the batch status.
The users who should be notified by email should have an email configured in System administration > Users > Users and select Options from the Set up menu. You can only assign one email address per alert so if you need to notify multiple users you would need to create an alert rule for each user. (I haven’t tested the option of creating a “generic” user with a distribution email address as another option for creating 1 rule with multiple notifications. This would prevent the user from accessing the drill down from the email features to the transaction origin or disabling the alert to discontinue the alert emails.

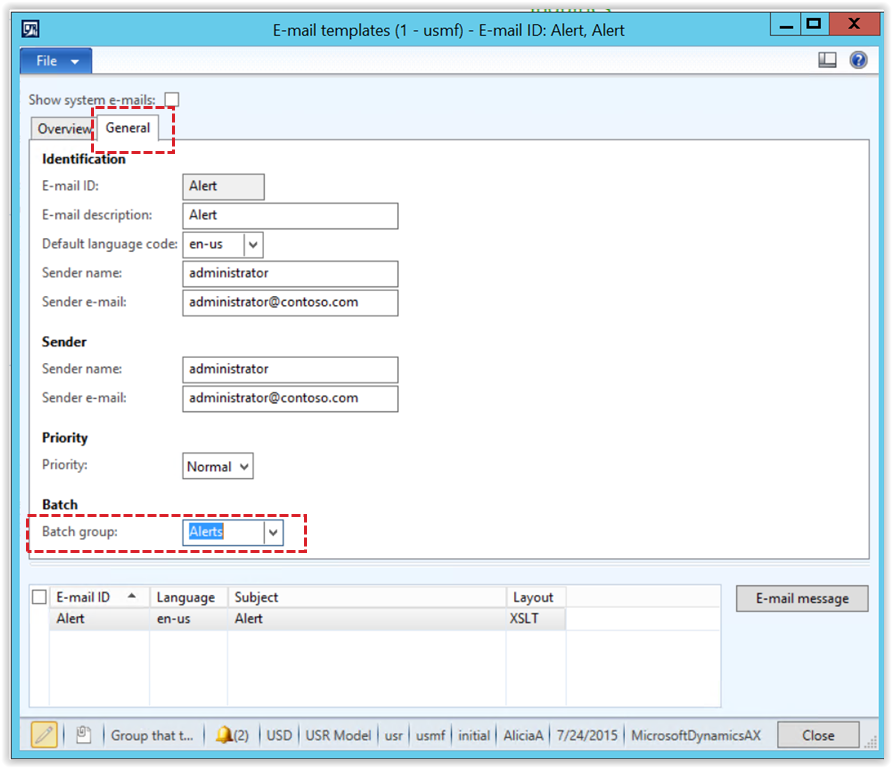
Optional items for Email alert setup (1 of 2): Create email template for alerts. Organization administration > Setup > E-mail templates. Add a new record and enter ID, description, default language, as well as the sender’s name and email address that will be displayed in the message. Add a record in the bottom half of the form and specify the language, subject text (email subject line) , and Layout (format).
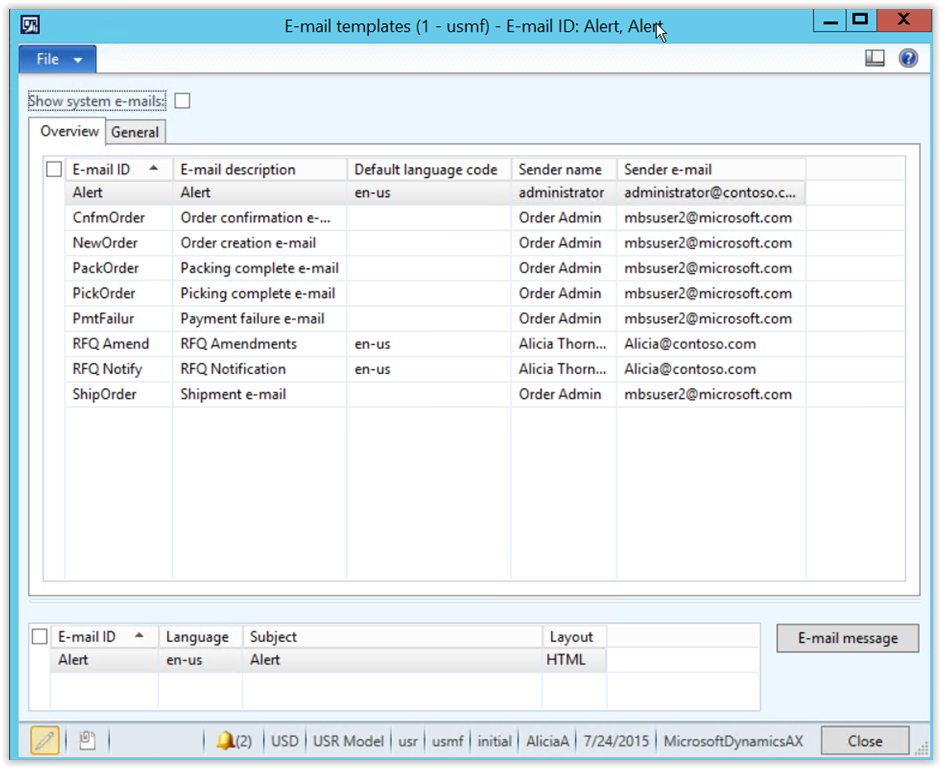
Select E-mail message and compose text for body of email. Layout options are either HTML or XLST. Select the General tab and attach email template to Batch group.
Optional items for alert setup (2 of 2): Drill down capability from alert emails. Navigate to System administration > Setup > System parameters. Select Alerts.
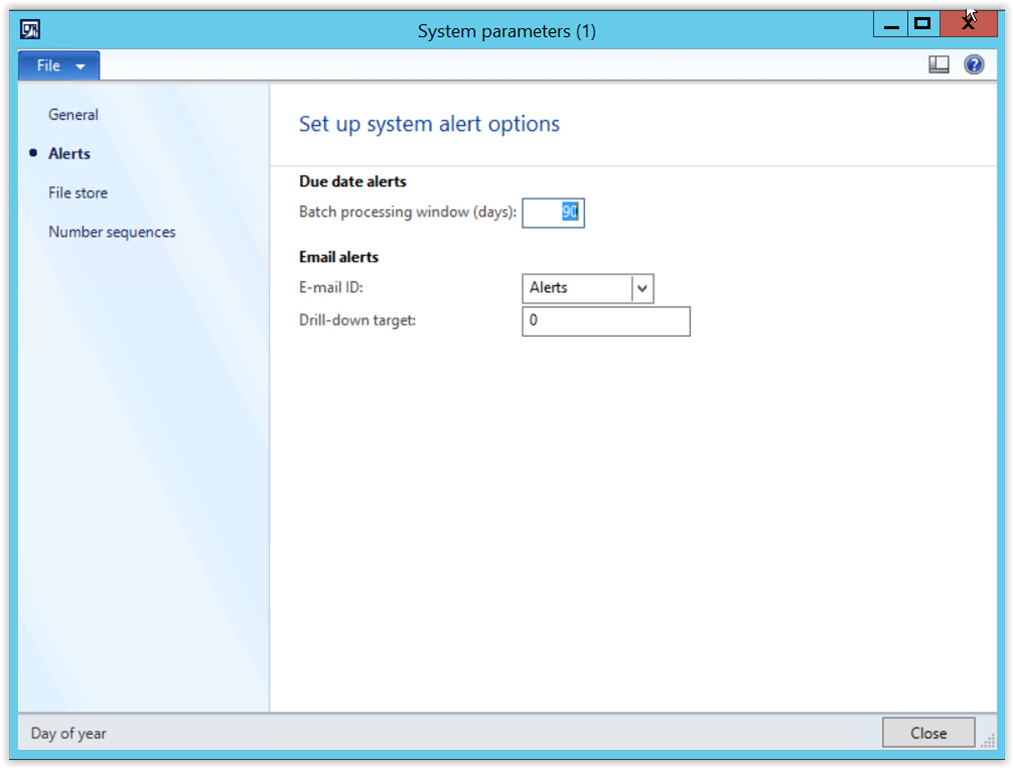
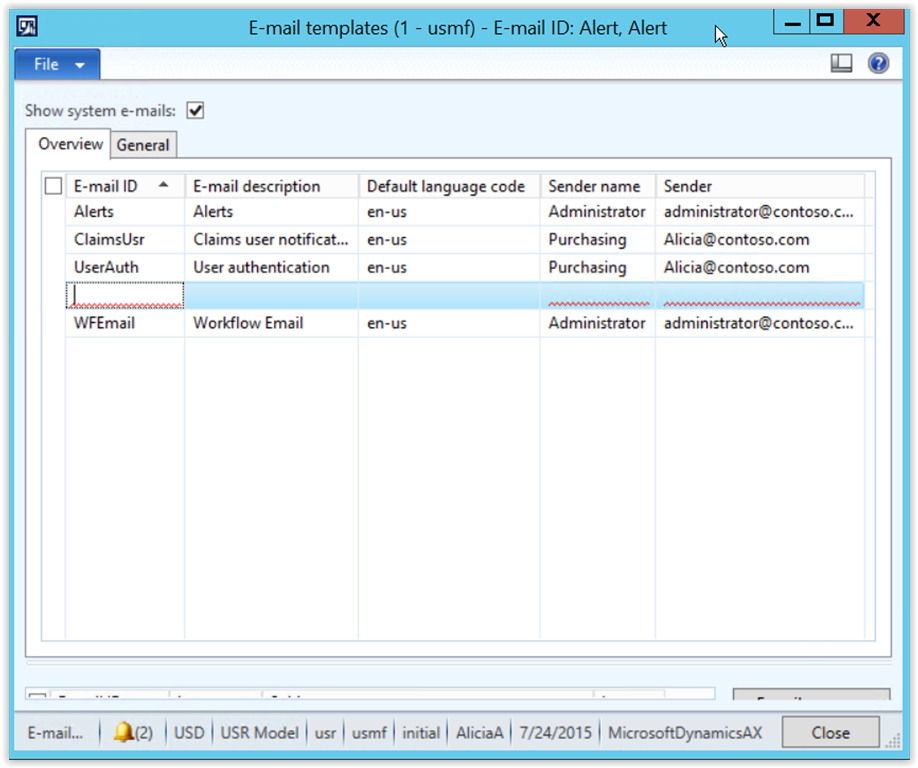
** In order to select “Alerts” E-mail ID in System parameters you need to create a ‘system e-mail’. When you check the Show system emails box there is no obvious way to create New so you must click anywhere in the grid and then Ctrl+N to create a new system e-mail record.
This allows users to click to access alerts, alert rules or the alert origin directly from the email message. To enable this, insert the email links in the template defined in System Parameters (above). More information on setting up drill down links can be found here.
A retry schedule for emails that the system has not been able to send can be defined in System administration > Periodic > E-mail processing > Retry schedule. More information regarding this and monitoring email messaging and statuses can be found here.
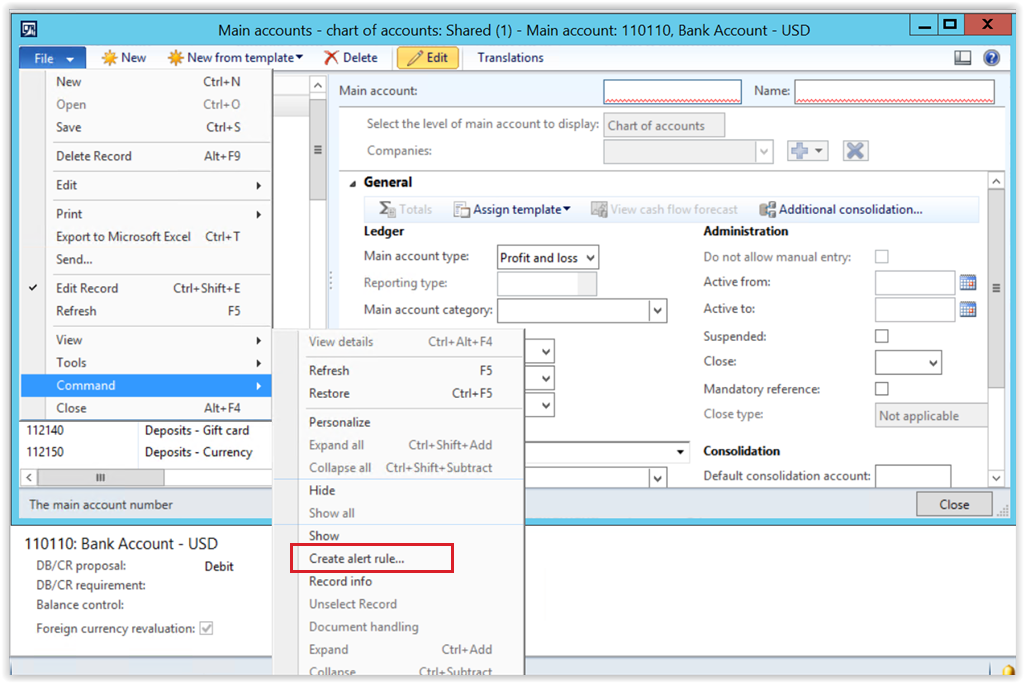
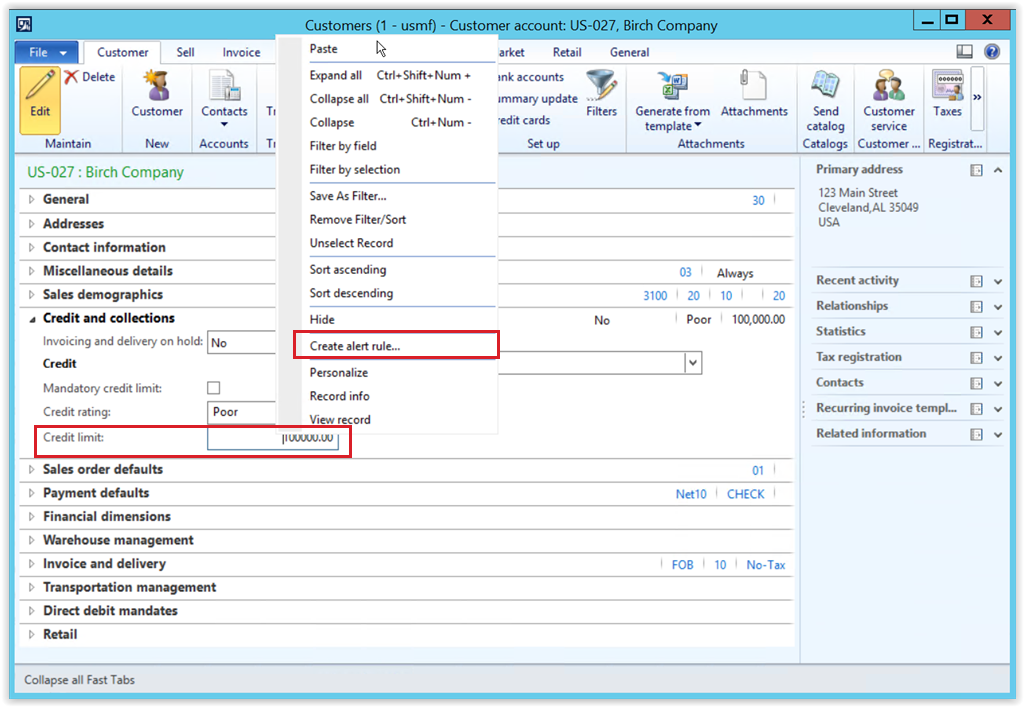
Setting up an alert: Alert rules can be created directly from the AX form that triggers them. Open the form, then use File menu> Command> Create alert rule. This will allow you to include a selection of <All fields> or select a specific field.
Alternatively, to trigger an alert from a specific field, right click on the field in the form and choose ‘Create alert rule’.
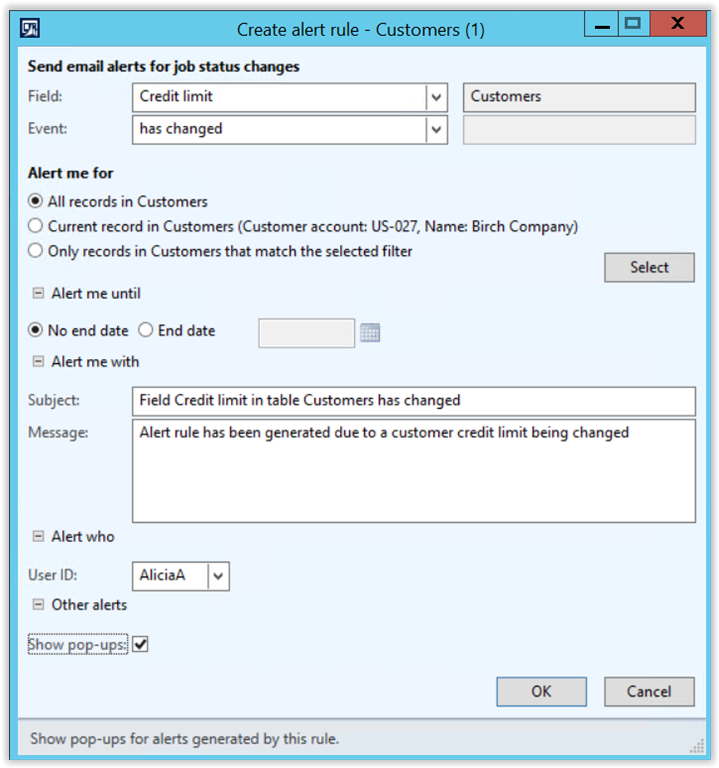
Either action opens both the ‘Manage alert rules’ and the ‘Create alert rule form’.
Alert rules define when alerts will trigger.
Example: Setting up an alert directly from a form – This alert rule starts by opening a customer record (Accounts receivable> Common> Customers> All customers), then right clicking on the ‘Credit limit’ field. This prompted the system to create an alert rule base upon that field. The subject and message fields contain information that will be included in the pop up alert. This is separate from the email message contents.
Due-date type event options: If the field you are on when selecting Create alert rule is a date field your Event options will include: (Is due in, Is due, Was due this amount of time ago)
Update-type event options: If the field you are creating an alert rule for is not a date field you will be presented with some combination of update-type event options: (Is set to, Has been postponed, Has been postponed until at the earliest, Is set to an earlier date, Is set to a date earlier than, Has decreased below, Has increased above.)
Create-type and delete-type events: There may also be event options for; Record has been created & Record has been deleted.
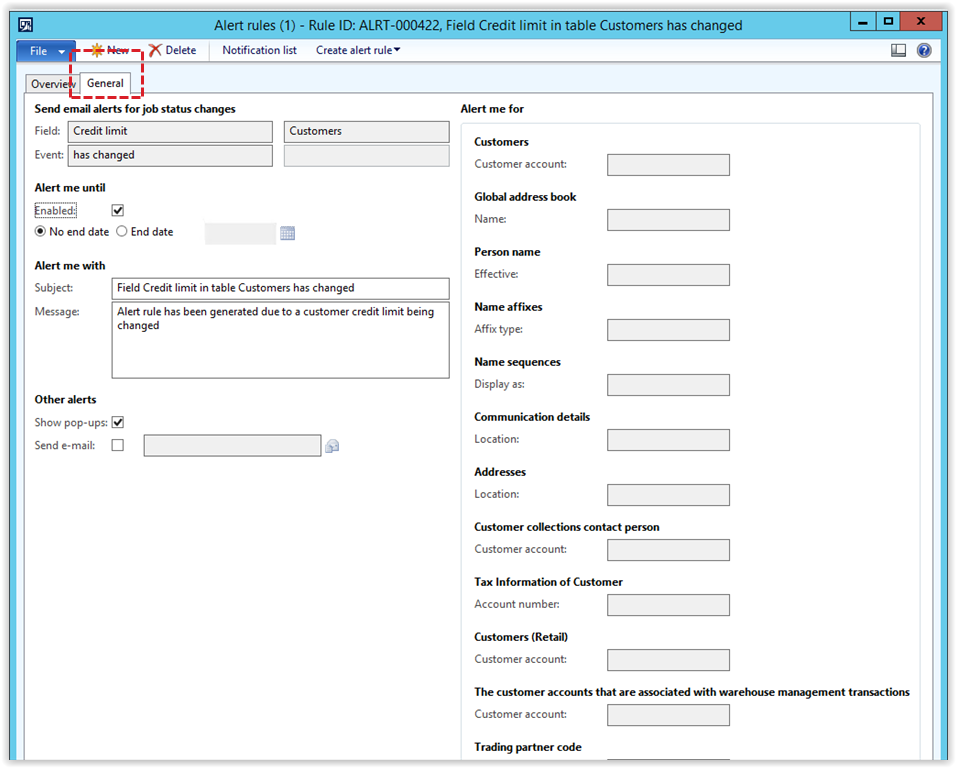
Alert me for: In the Alert me for area of the Create alert rule form, you can use conditions to control when you are alerted about events. Use the select button to create specific criteria for the conditions you wish.
Alert me until: In the Alert me until area of the Create alert rule form, you can specify how long you want the alert rule to be active.
Alert contents: In the Alert me with area of the Create alert rule form, you can specify the subject text and message text that you want the alert messages to use.
User ID: In the Alert who area of the Create alert rule form, you can specify which user you want to receive the alert messages. By default, your user ID is selected.
Delivery method: In the Other alerts area of the Create alert rule form, you can specify whether you want your alerts to be delivered as pop-up messages or email messages.
Pop up Alerts display: Pop up alerts will display in the lower right corner of the any active window.
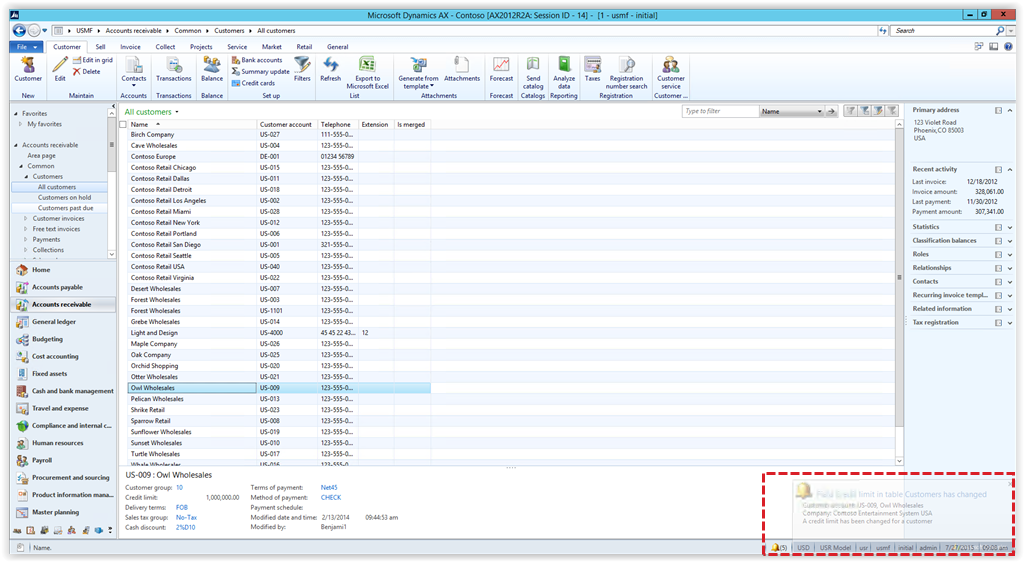
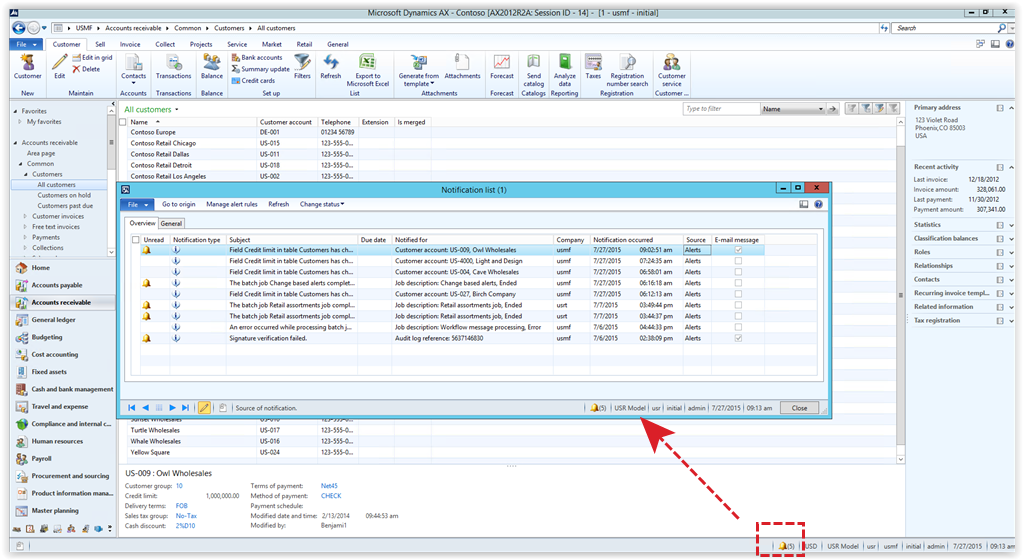
Alerts are also indicated on the status bar by a number (#) next to the bell icon. Click on the alert (bell) icon to open. Selecting an alert gives access to 4 menu options:
Go to origin: Opens the form that contains the change that triggered the alert
Manage alert: Opens the rule that generated the alert and allows access to change some alert settings including disabling the alert.
Refresh: update the displayed alerts and their status
Change status: To read or To unread
E-mail message column indicates if an email was sent for the alert.
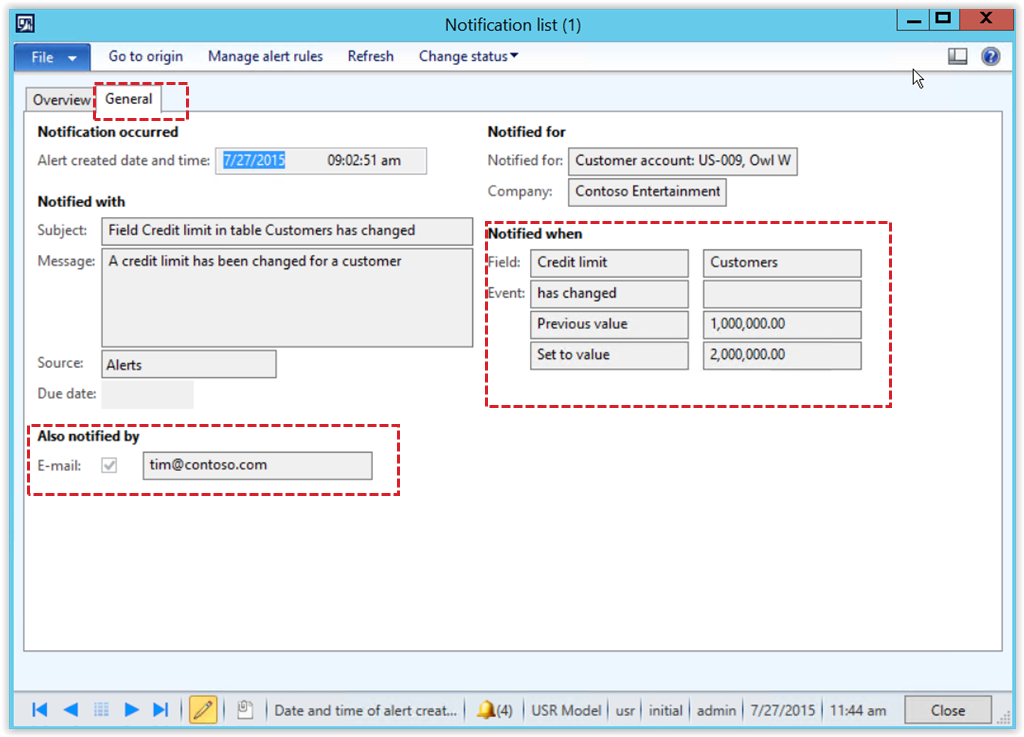
Additional information can be seen related to a pop up change based alert. Highlight the alert you want more information about and select the General tab.
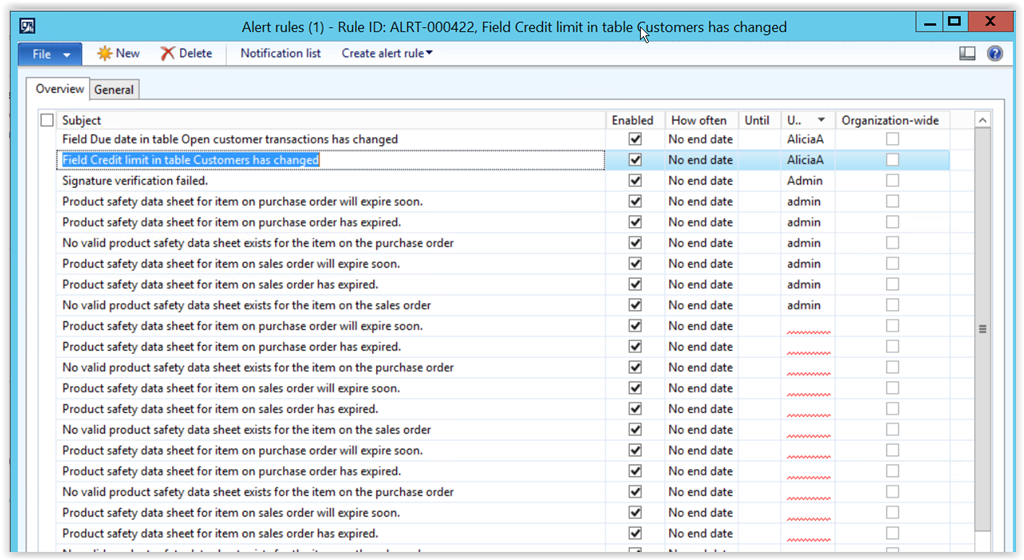
Manage alert rules:
Organization administration> Setup> Alerts> Alert rules.
The ‘General’ tab displays details on the alert selected.
Alerts can be deleted from this form.
Alerts can only be added to this form by using an alert template.
For more information regarding Alerts in Microsoft Dynamics AX, check out the resources available on TechNet. And to stay In The Know, connect with us via social media, or check out more posts on our blog.